API 路由
编辑
学习如何使用 Expo Router 创建服务器端点。
Expo Router 使您能够在您的 app 目录中为所有平台编写安全的服务器代码。
export function GET(request: Request) {
  return Response.json({ hello: 'world' });
}
服务器功能需要一个自定义服务器,您可以将其部署到 EAS 或大多数 其他托管服务提供商。
什么是 API 路由
API 路由是在匹配路由时在服务器上执行的函数。它们可以用于安全处理敏感数据,例如 API 密钥,或实现自定义服务器逻辑,例如交换认证码以获取访问令牌。API 路由应在 WinterCG-合规环境中执行。
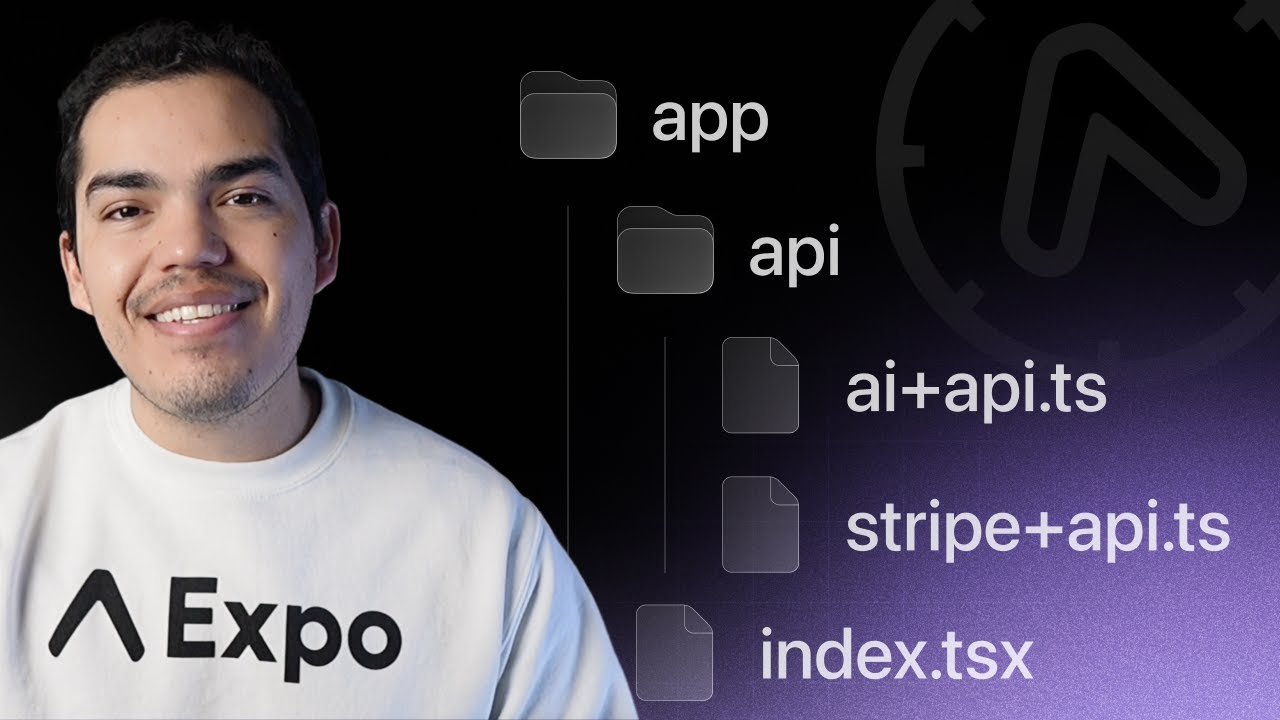
在 Expo 中,API 路由是通过在 app 目录中创建带有 +api.ts 扩展名的文件来定义的。例如,以下 API 路由在匹配 /hello 路由时执行。
appindex.tsxhello+api.tsAPI Route创建 API 路由
1
确保您的项目使用服务器输出,这将配置导出和生产构建以生成服务器捆绑包以及客户端捆绑包。
{
  "web": {
    "output": "server"
  }
}
2
在 app 目录中创建一个 API 路由。例如,添加以下路由处理程序。它是在匹配 /hello 路由时执行的。
export function GET(request: Request) {
  return Response.json({ hello: 'world' });
}
您可以从服务器路由导出以下函数中的任何一个 GET, POST, PUT, PATCH, DELETE, HEAD, 和 OPTIONS。该函数在匹配相应的 HTTP 方法时执行。不支持的方法将自动返回 405: Method not allowed。
3
使用 Expo CLI 启动开发服务器:
- npx expo4
您可以对路由发出网络请求以访问数据。运行以下命令测试路由:
- curl http://localhost:8081/hello您还可以从客户端代码中发出请求:
import { Button } from 'react-native';

async function fetchHello() {
  const response = await fetch('/hello');
  const data = await response.json();
  alert('Hello ' + data.hello);
}

export default function App() {
  return <Button onPress={() => fetchHello()} title="Fetch hello" />;
}
相对获取请求会自动相对于开发服务器的源进行获取,并且可以使用 app.json 中的 origin 字段在生产环境中进行配置:
{
  "plugins": [
    [
      "expo-router",
      {
        "origin": "https://evanbacon.dev/"
      }
    ]
  ]
}
通过设置 EXPO_UNSTABLE_DEPLOY_SERVER=1 环境变量,可以在 EAS 构建期间自动配置此 URL。这将触发版本化的服务器部署,自动将 origin 设置为预览部署 URL。
5
将网站和服务器部署到 托管服务提供商,以便在生产环境中在原生和网页上访问路由。
API 路由文件名不能有特定于平台的扩展名。例如,hello+api.web.ts 将无法工作。
请求
Requests use the global, standard Request object.
export async function GET(request: Request, { post }: Record<string, string>) {
  // const postId = new URL(request.url).searchParams.get('post')
  // fetch data for 'post'
  return Response.json({ ... });
}
请求体
使用 request.json() 函数访问请求体。它会自动解析请求体并返回结果。
export async function POST(request: Request) {
  const body = await request.json();

  return Response.json({ ... });
}
请求查询参数
可以通过解析请求 URL 来访问查询参数:
export async function GET(request: Request) {
  const url = new URL(request.url);
  const post = url.searchParams.get('post');

  // fetch data for 'post'
  return Response.json({ ... });
}
响应
响应使用全局标准 Response 对象。
export function GET() {
  return Response.json({ hello: 'universe' });
}
错误
对于错误情况,您可以创建具有任何状态码和响应体的 Response。
export async function GET(request: Request, { post }: Record<string, string>) {
  if (!post) {
    return new Response('No post found', {
      status: 404,
      headers: {
        'Content-Type': 'text/plain',
      },
    });
  }
  // fetch data for `post`
  return Response.json({ ... });
}
Making requests with an undefined method will automatically return 405: Method not allowed. If an error is thrown during the request, it will automatically return 500: Internal server error.
Runtime API
The server runtime API andexpo-serverare available in SDK 54 and later and require a deployed server for production use.
You can use the expo-server library to use several utilities and code patterns that work in any server-side Expo code. This includes utilities to get request metadata, for scheduling tasks, and for error handling.
- npx expo install expo-serverUsing expo-server is not limited to API routes and it can be used in any other server code as well, for example, in server middleware.
Error handling
You can abort a request and instead return an error Response by throwing a StatusError. This is a special Error instance that will be replaced with an HTTP response replacing the error itself.
import { StatusError } from 'expo-server';

export async function GET(request: Request, { post }: Record<string, string>) {
  if (!post) {
    throw new StatusError(404, 'No post found');
  }
  // ...
}
When composing your own server utilities and helpers, the StatusError is a more convenient way to handle exceptions, since throwing them interrupts any API functions and returns an error early.
StatusErrors accept a status code and an error message, which can also optionally be passed as a JSON, or Error object, and will always return a Response with a JSON body with an error key set to their error message.
This can be restrictive, and isn't suitable for all cases. Sometimes it might be beneficial to instead throw a Response object, which interrupts your logic as well, but replaces the resolved Response from your API route directly, without a StatusError wrapper. For example, this can be used to create redirect responses.
import { StatusError } from 'expo-server';

export async function GET(request: Request, { post }: Record<string, string>) {
  if (!post) {
    throw Response.redirect('https://expo.dev', 302);
  }
  // ...
}
Request metadata
Requests typically carry most metadata you'll need in their headers. However, expo-server provides some helper functions to retrieve common values more easily.
Helper functions from expo-server return values that are scoped to the current Request. You can only call these functions in server-side code and only during ongoing requests.
A common value that you may need to access is the request's origin URL. The origin URL, typically transmitted on a request's Origin header, represents the URL that a user used to access your API route. This may differ from any internal deployment URL that your server sees when the request is being proxied. You can use expo-server's origin() helper method to access this value.
import { origin } from 'expo-server';

export async function GET(request: Request) {
  const target = new URL('/help', origin() ?? request.url);
  return Response.redirect('https://expo.dev', 302);
}
Most runtimes that you deploy your server code to have a concept of environments, to differentiate between production or staging deployments. You can use expo-server's environment() helper to get an environment name. This value will differ depending on how you're running your server code.
import { environment } from 'expo-server';

export async function GET(request: Request) {
  const env = environment();
  if (env === 'staging') {
    return Response.json({ isStaging: true });
  } else if (!env) {
    return Response.json({ isProduction: true });
  } else {
    return Response.json({ env });
  }
}
Task scheduling
In your request handlers, you may need to run asynchronous tasks in parallel to your server logic.
export async function GET(request: Request) {
  // This will delay the response:
  await pingAnalytics(...);

  const data = await fetchExampleData(...);
  return Response.json({ data });
}
In the above example, an await-ed function call delays the rest of the API route's execution. If we don't want to delay a Response, then await-ing this call isn't suitable. However, calling the function without await wouldn't guarantee that this task keeps a serverless function running.
Instead, you can use expo-server's runTask() helper function to run concurrent tasks. This is equivalent to the waitUntil() method that you see in service worker code or other serverless runtimes.
import { runTask } from 'expo-server';

export async function GET(request: Request) {
  // This will NOT delay the response:
  runTask(async () => {
    await pingAnalytics(...);
  });

  const data = await fetchExampleData(...);
  return Response.json({ data });
}
With runTask, you have a compromise between await-ing and not await-ing asynchronous functions. They'll be run concurrently, and don't delay the API route's response or execution, but are also making sure the runtime is aware of them, and don't quit early.
However, sometimes you may want to delay a task until after the API route has returned a Response. In such cases, you might prefer not to execute the task if the API has rejected it. Additionally, you may want to run a function only after a time-sensitive task has been completed to prevent concurrent code from delaying computation-heavy tasks in your API route.
You can use expo-server's deferTask() helper function to schedule tasks to run after a Response has been resolved by your API route.
import { deferTask } from 'expo-server';

export async function GET(request: Request) {
  // This will run after this entire function resolves:
  deferTask(async () => {
    await pingAnalytics(...);
  });

  const data = await fetchExampleData(...);
  return Response.json({ data });
}
Response headers
When structuring and splitting server logic into separate helper functions and files, it may be necessary to modify Response headers before a Response has been created.
For example, you may need to add metadata in server middleware to a Response before your API route code is running.
import { setResponseHeaders } from 'expo-server';

export default function middleware(request: Request) {
  // Rate limiters typically add a `Retry-After` header
  setResponseHeaders({ 'Retry-After': '3600' });
}
In the above example, a Retry-After header is added to a future Response that an API route may be creating. This can also be extended for authentication and cookies.
import { setResponseHeaders } from 'expo-server';

export default function middleware(request: Request) {
  // Append cookie to future response
  setResponseHeaders(headers => {
    headers.append('Set-Cookie', 'token=123; Secure');
  });
}
打包
API 路由与 Expo CLI 和 Metro bundler 一起打包。它们可以访问与您的客户端代码相同的所有语言特性:
- TypeScript — 类型和 tsconfig.json 路径。
- 环境变量 — 服务器路由可以访问所有环境变量,而不仅仅是以
EXPO_PUBLIC_前缀的变量。 - Node.js 标准库 — 确保您在本地的服务器环境中使用正确版本的 Node.js。
- babel.config.js 和 metro.config.js 支持 — 设置在客户端和服务器代码中均有效。
安全性
路由处理程序在与客户端代码隔离的沙箱环境中执行。这意味着您可以安全地在路由处理程序中存储敏感数据,而无需将其暴露给客户端。
- 导入具有秘密的代码的客户端代码将包含在客户端捆绑包中。它适用于 app 目录 中的 所有文件,即使它们不是路由处理程序文件(例如带有 +api.ts 后缀的文件)。
- 如果秘密在 <...>+api.ts 文件中,它将不包含在客户端捆绑包中。这适用于路由处理程序中导入的所有文件。
- 秘密剥离发生在
expo/metro-config中,并要求在 metro.config.js 中使用它。
部署
当您准备好部署到生产环境时,运行以下命令以在 dist 目录中创建服务器捆绑包(有关更多详细信息,请参见 Expo CLI 文档):
- npx expo export --platform web此服务器可以通过 npx expo serve (在 Expo SDK 52 及更高版本可用)进行本地测试,在网页浏览器中访问该 URL,或者使用 origin 设置为本地服务器 URL 创建本地构建。
您可以使用 EAS Hosting 或其他第三方服务将服务器部署到生产。
如果您想导出 API 路由并跳过生成应用程序的网站版本,可以使用以下命令,这将生成一个只包含您项目服务器代码的 dist 目录。
- npx expo export --platform web --no-ssgEAS Hosting 是部署您的 Expo API 路由和服务器的最佳方式。
原生部署
这是从 SDK 52 及更高版本开始的实验性功能。该过程将在未来的版本中更加自动化,并提供更好的支持。
Expo Router 中的服务器功能(API 路由和 React 服务器组件)集中在 window.location 和 fetch 的原生实现上,这些实现指向远程服务器。在开发中,我们自动指向使用 npx expo start 运行的开发服务器,但为了使原生构建在生产中工作,您需要将服务器部署到安全的主机,并设置 Expo Router 配置插件的 origin 属性。
配置后,像相对获取请求 fetch('/my-endpoint') 将自动指向服务器源。
这个部署过程可以实验性地自动化,以确保在原生构建期间的正确版本控制,方法是使用 EXPO_UNSTABLE_DEPLOY_SERVER=1 环境变量。
以下是如何配置您的原生应用以在构建时自动部署并链接一个版本化的生产服务器:
1
确保 app.json 中的 origin 字段 未 设置,或者未在 expo.extra.router.origin 字段中设置。此外,确保不使用 app.config.js,因为这尚不支持自动链接的部署。
2
通过先在本地部署一次来为项目设置 EAS Hosting。
- npx expo export -p web- eas deploy3
在您的 .env 文件中设置 EXPO_UNSTABLE_DEPLOY_SERVER 环境变量。这将用于在 EAS Build 期间启用实验性服务器部署功能。
EXPO_UNSTABLE_DEPLOY_SERVER=1
4
您现在准备使用自动服务器部署!运行构建命令以启动该过程。
- eas build您还可以使用以下命令在本地运行:
# Android- npx expo run:android --variant release# iOS- npx expo run:ios --configuration Release关于原生应用自动服务器部署的备注:
- 如果某些设置不正确,可能会在 EAS Build 的
Bundle JavaScript阶段发生服务器故障。 - 如果愿意,您可以在构建应用之前手动部署服务器并设置
originURL。 - 可通过设置环境变量
EXPO_NO_DEPLOY=1强制跳过自动部署。 - 自动部署尚不支持 动态应用配置(app.config.js 和 app.config.ts)文件。
- 部署日志将写入
.expo/logs/deploy.log。 - 在
EXPO_OFFLINE模式下不会运行部署。
在本地测试原生生产应用
在本地开发服务器上测试生产构建通常非常有用,以确保一切按预期工作。这可以显著加快调试过程。
1
导出生产服务器:
- npx expo export2
在本地托管生产服务器:
- npx expo serve3
在 app.json 的 origin 字段中设置 origin。确保 expo.extra.router.origin 中没有生成的值。它应该是 http://localhost:8081(假设 npx expo serve 在默认端口上运行)。
{
  "expo": {
    "plugins": [
      [
        "expo-router",
        {
          "origin": "http://localhost:8081"
        }
      ]
    ]
  }
}
记得在生产部署时删除此 origin 值。
4
在模拟器上以发布模式构建应用:
- EXPO_NO_DEPLOY=1 npx expo run:ios --configuration ReleaseYou should now see requests coming in to the local server. Use a tool like Proxyman to inspect network traffic for the simulator and gain better insight.
You can experimentally change the URL and quickly rebuild for iOS using the --unstable-rebundle flag. This will swap out the app.json and client assets for new ones, skipping the native rebuild.
For example, you can run eas deploy to get a new deployment URL, add it to the app.json, then run npx expo run:ios --unstable-rebundle --configuration Release to quickly rebuild the app with the new URL.
You will want to make a clean build before sending to the store to ensure no transient issues are present.
Hosting on third-party services
Theexpo-serverlibrary was added in SDK 54. Use@expo/serverfor older SDKs instead.
Every cloud hosting provider needs a custom adapter to support the Expo server runtime. The following third-party providers have unofficial or experimental support from the Expo team.
Before deploying to these providers, it may be good to be familiar with the basics of npx expo export command:
- dist is the default export directory for Expo CLI.
- Files in public directory are copied to dist on export.
- The
expo-serverpackage is a server-side runtime for exported Expo web and API route artifacts. expo-serverdoes not inflate environment variables from .env files. They are expected to load either by the hosting provider or the user.- Metro is not included in the server.
The expo-server library contains adapters for various providers and runtimes. Before proceeding with any of the below sections, install the expo-server library.
- npx expo install expo-serverBun
1
导出网站以供生产:
- bunx expo export -p web2
编写一个服务器入口文件,以提供静态文件并将请求委托给服务器路由:
import { createRequestHandler } from 'expo-server/adapter/bun';

const CLIENT_BUILD_DIR = `${process.cwd()}/dist/client`;
const SERVER_BUILD_DIR = `${process.cwd()}/dist/server`;
const handleRequest = createRequestHandler({ build: SERVER_BUILD_DIR });

const port = process.env.PORT || 3000;

Bun.serve({
  port: process.env.PORT || 3000,
  async fetch(req) {
    const url = new URL(req.url);
    console.log('Request URL:', url.pathname);

    const staticPath = url.pathname === '/' ? '/index.html' : url.pathname;
    const file = Bun.file(CLIENT_BUILD_DIR + staticPath);

    if (await file.exists()) return new Response(await file.arrayBuffer());

    return handleRequest(req);
  },
  websocket,
});

console.log(`Bun server running at http://localhost:${port}`);
4
使用 bun 启动服务器:
- bun run server.tsExpress
1
安装所需的依赖项:
- npm i -D express compression morgan2
导出网站以供生产:
- npx expo export -p web3
编写一个服务器入口文件,以提供静态文件并将请求委托给服务器路由:
#!/usr/bin/env node

const path = require('path');
const { createRequestHandler } = require('expo-server/adapter/express');

const express = require('express');
const compression = require('compression');
const morgan = require('morgan');

const CLIENT_BUILD_DIR = path.join(process.cwd(), 'dist/client');
const SERVER_BUILD_DIR = path.join(process.cwd(), 'dist/server');

const app = express();

app.use(compression());

// http://expressjs.com/en/advanced/best-practice-security.html#at-a-minimum-disable-x-powered-by-header
app.disable('x-powered-by');

process.env.NODE_ENV = 'production';

app.use(
  express.static(CLIENT_BUILD_DIR, {
    maxAge: '1h',
    extensions: ['html'],
  })
);

app.use(morgan('tiny'));

app.all(
  '/{*all}',
  createRequestHandler({
    build: SERVER_BUILD_DIR,
  })
);
const port = process.env.PORT || 3000;

app.listen(port, () => {
  console.log(`Express server listening on port ${port}`);
});
4
使用 node 命令启动服务器:
- node server.tsNetlify
Third-party adapters are subject to breaking changes. We have no continuous tests against them.
1
创建一个服务器入口文件。所有请求将通过此中间件委托。确切的文件位置很重要。
import path from 'node:path';
import { createRequestHandler } from 'expo-server/adapter/netlify';

export default createRequestHandler({
  build: path.join(__dirname, '../../dist/server'),
});
2
在项目根目录中创建一个 Netlify 配置文件,以将所有请求重定向到服务器函数。
[build]
  command = "expo export -p web"
  functions = "netlify/functions"
  publish = "dist/client"

[[redirects]]
  from = "/*"
  to = "/.netlify/functions/server"
  status = 404

[functions]
  # 包含所有内容,以确保可以使用动态路由。
  included_files = ["dist/server/**/*"]

[[headers]]
  for = "/dist/server/_expo/functions/*"
  [headers.values]
    # 将其设置为60秒作为示例。
    "Cache-Control" = "public, max-age=60, s-maxage=60"
3
创建配置文件后,您可以使用 Expo CLI 构建网站和功能:
- npx expo export -p web4
使用 Netlify CLI 部署到 Netlify。
# 如果需要,请全局安装 Netlify CLI。- npm install netlify-cli -g# 部署网站。- netlify deploy您现在可以通过 Netlify CLI 提供的 URL 访问您的网站。运行 netlify deploy --prod 将发布到生产 URL。
5
如果您使用任何环境变量或 .env 文件,请将它们添加到 Netlify。您可以通过访问 站点设置 并将它们添加到 构建与部署 部分来做到这一点。
Vercel
Third-party adapters are subject to breaking changes. We have no continuous tests against them.
1
创建一个服务器入口文件。所有请求将通过此中间件委托。确切的文件位置很重要。
const { createRequestHandler } = require('expo-server/adapter/vercel');

module.exports = createRequestHandler({
  build: require('path').join(__dirname, '../dist/server'),
});
2
在项目根目录中创建一个 Vercel 配置文件 (vercel.json) 以将所有请求重定向到服务器函数。
{
  "buildCommand": "expo export -p web",
  "outputDirectory": "dist/client",
  "functions": {
    "api/index.ts": {
      "runtime": "@vercel/node@5.1.8",
      "includeFiles": "dist/server/**"
    }
  },
  "rewrites": [
    {
      "source": "/(.*)",
      "destination": "/api/index"
    }
  ]
}
新版本的 vercel.json 不再使用 routes 和 builds 配置选项,并自动从 dist/client 输出目录提供您的公共资产。
{
  "version": 2,
  "outputDirectory": "dist",
  "builds": [
    {
      "src": "package.json",
      "use": "@vercel/static-build",
      "config": {
        "distDir": "dist/client"
      }
    },
    {
      "src": "api/index.ts",
      "use": "@vercel/node",
      "config": {
        "includeFiles": ["dist/server/**"]
      }
    }
  ],
  "routes": [
    {
      "handle": "filesystem"
    },
    {
      "src": "/(.*)",
      "dest": "/api/index.ts"
    }
  ]
}
旧版 的 vercel.json 需要一个 @vercel/static-build 运行时,从 dist/client 输出目录提供您的资产。
3
注意: 此步骤仅适用于 旧版 的 vercel.json 用户。如果您使用的是 v3,可以跳过此步骤。
创建配置文件后,在您的 package.json 文件中添加一个 vercel-build 脚本,并将其设置为 expo export -p web。
4
使用 Vercel CLI 部署到 Vercel。
# 如果需要,请全局安装 Vercel CLI。- npm install vercel -g# 构建网站。- vercel build# 部署网站。- vercel deploy --prebuilt您现在可以通过 Vercel CLI 提供的 URL 访问您的网站。
已知限制
API 路由测试版中当前不支持几个已知功能。
不支持动态导入
API 路由当前通过将所有代码(减去 Node.js 内置的)捆绑到一个文件中来工作。这意味着您无法使用未与服务器捆绑在一起的任何外部依赖项。例如, sharp 这样的库,包含多个平台二进制文件,无法使用。这将在未来版本中得到解决。
不支持 ESM
当前的捆绑实现选择更统一而不是灵活。这意味着原生不支持 ESM 的限制被应用于 API 路由。所有代码将被转译为 Common JS(require/module.exports)。但是,我们建议您尽管如此还使用 ESM 编写 API 路由。这将在未来版本中得到解决。